


7 routines that will make you a better photographer
Photography comes naturally to some people, but most of us need a little practice. Adopting these routines can help.

At the risk of stating the obvious, when you use manual exposure mode you are in control of aperture and shutter speed. That means in order to take successful images, you need to consider whether you want to blur or freeze movement and how much depth of field you want for every shot.
And if you set specific sensitivity settings rather than using the Auto ISO option, you also determine how much noise
there will be.
Many experienced photographers understand the principle of manual exposure, but they use the semi-automatic modes of shutter priority and aperture priority for convenience.
Using manual exposure mode makes you think about exposure and how you want your images to look much more carefully – and that can only be a good thing.

2. Check the histogram
Checking your camera’s histogram view for each image is a great way of getting a better understanding of brightness and exposure. This simple graph indicates the number of pixels with brightness values running from 0 (black) to 255 (white) with the tallest peaks appearing at the most common brightnesses.
If there’s a very big peak at the far right of the scale, there large bright areas and some pixels are likely to be burned out.
Meanwhile a big peak at the opposite end indicates large dark areas with a strong chance that some shadows are featureless masses of black.
If you check the histogram of every image that you shoot you’ll build a good picture of how the light and dark areas in a scene translate into an image as well as how altering exposure impacts upon the histogram/image.
In time you’ll learn how interpret what you see into exposure settings so that you get the shots you want first time.

3. Use your camera’s spot-meter
Like using the histogram view, using your camera’s spot-meter will help your understanding of exposure develop.
Whereas a camera’s evaluative, matrix or multi-segment metering system is designed to give an exposure settings that work for the image as a whole, the spot-meter option takes measurements from a very precise location.
It is designed to suggest exposure settings that make the target area a mid-tone. This means you need to be very careful where you position the metering point, if its over a bright highlight or dark shadow the image will be badly under- or over-exposed respectively.

4. Set a custom white balance
Many photographers rely on their camera’s automatic white balance system to get colours looking right and in most natural lighting conditions it’s a pretty safe bet.
A few may use some of the preset values to deal with some specific lighting conditions, and quite a few rely on the fact that they shoot raw images and can correct white balance with a click of the mouse post-capture.
However, if you use your camera’s custom or manual white balance option on a regular basis you will develop a greater understanding of colour and white balance.
You’ll also see the final image straight after it’s shot rather than at a later date on your computer monitor, so you’ll have a much better idea if you’ve got the image that you want.

5. Shoot using just one focal length
Zoom lenses make life much easier because instead of having to carry a bag stuffed full with lenses you can get away with just two or three, depending upon what you are doing.
The downside to zoom lenses, however, is that they make you lazy. Instead of walking towards a subject we tend to zoom in. Moving towards and around a subject enables us to discover new angles and perspectives and can often lead to better, more interesting images.
One way to force yourself into the habit of exploring subjects more is to restrict yourself to just one focal length. If you have a collection of prime lenses, great, pick one and spend the day/week using it and it alone. If you have zoom lenses, pick one, choose a focal length within its range and shoot everything at that.
As well as finding new angles you’ll also develop a deeper understanding of depth of field control at the focal length – there’s less depth of field at any given aperture as focal length increases.
This will make it easier for you to decide what focal length and aperture to use in the future and you’ll take more creative images.
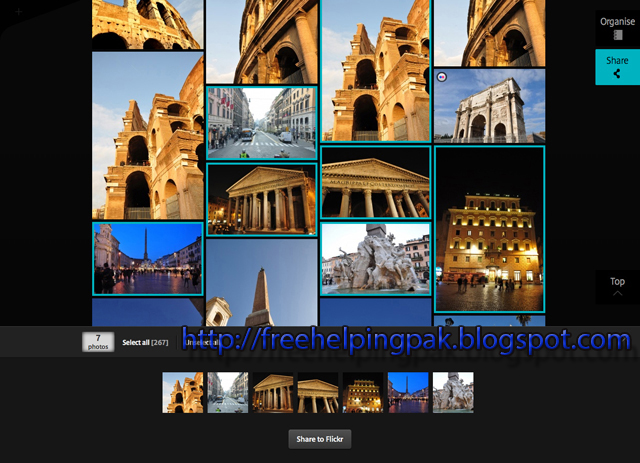
6. Share one image every day
Showing other people your shots (and looking at their images) is a great way of gauging the strength of your images and getting constructive feedback.
And there are lots of website, apps and organisations that can help you do it: Instagram, Facebook, Flickr, Twitter and Photocrowd to name just a few.
However, rather than bombarding people with lots of shots, why not commit to sharing just one every day and making it the best image that you can?
Undertaking the challenge of shooting at least one image a day will mean that you’re constantly looking for images and you’ll be alive to new photographic opportunities.
And the pressure of having to share one of those images everyday will give you extra determination to make it a great shot.

Get into the habit of rating your images from 0 to 5 after every shoot – where 0 is the worst (and unstarred) and a five-star image is the best.
As well as making you focus on your pictures, trying to separate the wheat from the chaff, you will gain an insight into the mistakes that you make and your photographic process.
For example, if you find that you habitually take a wide shot, which is okay but rather cluttered, before moving to a new vantage point to take a less cluttered image and then go a bit closer to get a shot from a more dynamic angle, then you are on your way to taking better images from the outset.
Rating your images will also help you select the shot that you want to share.

1. Use manual exposure
At the risk of stating the obvious, when you use manual exposure mode you are in control of aperture and shutter speed. That means in order to take successful images, you need to consider whether you want to blur or freeze movement and how much depth of field you want for every shot.
And if you set specific sensitivity settings rather than using the Auto ISO option, you also determine how much noise
there will be.
Many experienced photographers understand the principle of manual exposure, but they use the semi-automatic modes of shutter priority and aperture priority for convenience.
Using manual exposure mode makes you think about exposure and how you want your images to look much more carefully – and that can only be a good thing.
2. Check the histogram
Checking your camera’s histogram view for each image is a great way of getting a better understanding of brightness and exposure. This simple graph indicates the number of pixels with brightness values running from 0 (black) to 255 (white) with the tallest peaks appearing at the most common brightnesses.
If there’s a very big peak at the far right of the scale, there large bright areas and some pixels are likely to be burned out.
Meanwhile a big peak at the opposite end indicates large dark areas with a strong chance that some shadows are featureless masses of black.
If you check the histogram of every image that you shoot you’ll build a good picture of how the light and dark areas in a scene translate into an image as well as how altering exposure impacts upon the histogram/image.
In time you’ll learn how interpret what you see into exposure settings so that you get the shots you want first time.
3. Use your camera’s spot-meter
Like using the histogram view, using your camera’s spot-meter will help your understanding of exposure develop.
Whereas a camera’s evaluative, matrix or multi-segment metering system is designed to give an exposure settings that work for the image as a whole, the spot-meter option takes measurements from a very precise location.
It is designed to suggest exposure settings that make the target area a mid-tone. This means you need to be very careful where you position the metering point, if its over a bright highlight or dark shadow the image will be badly under- or over-exposed respectively.
4. Set a custom white balance
Many photographers rely on their camera’s automatic white balance system to get colours looking right and in most natural lighting conditions it’s a pretty safe bet.
A few may use some of the preset values to deal with some specific lighting conditions, and quite a few rely on the fact that they shoot raw images and can correct white balance with a click of the mouse post-capture.
However, if you use your camera’s custom or manual white balance option on a regular basis you will develop a greater understanding of colour and white balance.
You’ll also see the final image straight after it’s shot rather than at a later date on your computer monitor, so you’ll have a much better idea if you’ve got the image that you want.

5. Shoot using just one focal length
Zoom lenses make life much easier because instead of having to carry a bag stuffed full with lenses you can get away with just two or three, depending upon what you are doing.
The downside to zoom lenses, however, is that they make you lazy. Instead of walking towards a subject we tend to zoom in. Moving towards and around a subject enables us to discover new angles and perspectives and can often lead to better, more interesting images.
One way to force yourself into the habit of exploring subjects more is to restrict yourself to just one focal length. If you have a collection of prime lenses, great, pick one and spend the day/week using it and it alone. If you have zoom lenses, pick one, choose a focal length within its range and shoot everything at that.
As well as finding new angles you’ll also develop a deeper understanding of depth of field control at the focal length – there’s less depth of field at any given aperture as focal length increases.
This will make it easier for you to decide what focal length and aperture to use in the future and you’ll take more creative images.
6. Share one image every day
Showing other people your shots (and looking at their images) is a great way of gauging the strength of your images and getting constructive feedback.
And there are lots of website, apps and organisations that can help you do it: Instagram, Facebook, Flickr, Twitter and Photocrowd to name just a few.
However, rather than bombarding people with lots of shots, why not commit to sharing just one every day and making it the best image that you can?
Undertaking the challenge of shooting at least one image a day will mean that you’re constantly looking for images and you’ll be alive to new photographic opportunities.
And the pressure of having to share one of those images everyday will give you extra determination to make it a great shot.
7. Rate your images
Get into the habit of rating your images from 0 to 5 after every shoot – where 0 is the worst (and unstarred) and a five-star image is the best.
As well as making you focus on your pictures, trying to separate the wheat from the chaff, you will gain an insight into the mistakes that you make and your photographic process.
For example, if you find that you habitually take a wide shot, which is okay but rather cluttered, before moving to a new vantage point to take a less cluttered image and then go a bit closer to get a shot from a more dynamic angle, then you are on your way to taking better images from the outset.
Rating your images will also help you select the shot that you want to share.

Subscribe to:
Post Comments (Atom)


0 comments: